Finger injuries particularly jammed fingers, are common in basketball due to the fast-paced nature of the sport and frequent contact with the ball and other players.
Protecting the fingers is essential for both performance and injury prevention. One effective method of safeguarding a jammed finger is through proper taping techniques.
This article aims to provide a comprehensive guide on how to tape a jammed finger for basketball players.
By understanding the importance of finger protection and the purpose of taping, athletes can take proactive measures to support their injured fingers, maintain stability, and minimize the risk of further damage.
Whether you’re a seasoned player or new to the game, learning the correct taping procedures can significantly enhance your ability to handle the ball, maintain talent, and continue participating in basketball activities while facilitating the healing process of your jammed finger.
How To Tape A Jammed Finger For Basketball?
In the fast-paced and physical sport of basketball, jammed fingers are familiar. Taping a jammed finger provides stability and support, allowing players to continue playing while minimizing further injury.
Proper taping techniques can help protect the injured finger and promote healing. Here’s a guide to taping a jammed finger for basketball.
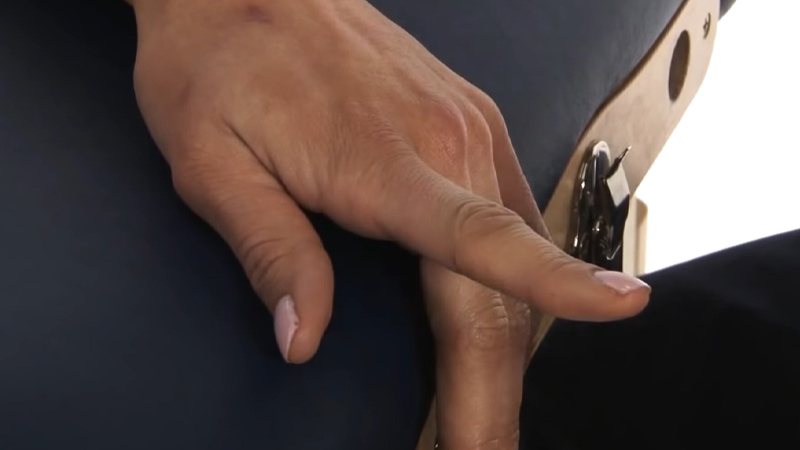
Prepare The Finger:
Ensure the jammed finger is clean and dry before taping. Gently assess the injury’s severity and ensure no fractures or dislocations.
Buddy taping involves securing the injured finger to an adjacent finger for added stability. Start by applying a small piece of adhesive tape to the base of the injured finger.
Then, tape the injured finger to the neighboring finger using figure-eight motions, providing adequate support without cutting off circulation.
Immobilization
To further immobilize the jammed finger, create a splint using a popsicle stick or tongue depressor. Place the sling on the injured finger, aligning it with its natural curvature. Secure the splint in place using adhesive tape.
Use a Band Aid or Taping Method
If you have a band aid, apply it to the injured finger and tape it in place. If your injury doesn’t require a band aid, use a method like duct tape or superglue to keep the fingers together.
Finger injuries can be tricky to fix without professional help; seek medical attention if necessary. In most cases, using ice will speed up the healing process and reduce inflammation. Keep any makeshift repair in place until you see a doctor or go for surgery
Wrap Finger Joints Above & Below Injury
If you have a finger jammed in a door, try to wrap the joints above and below the injury as tightly as possible with tape This will help to immobilize the joint while it heals You can also use an ice pack or cold water on the injured area for relief Don’t put pressure on the wound – this could lead to re-injury Take care not to overdo things; if pain is severe, seek medical attention.
Keep Fingers Close Together to Reduce Shock
If your finger is jammed in the handle of a ball, use pressure to push it out from between your fingers. Use tape to hold your hand close together and then pull on the taped area until the ball pops free.
Don’t try to remove a stuck object with force – you could injure yourself more severely than if you just left it be. If using duct tape isn’t an option, consider using a safety pin or some other blunt tool instead.
Remember: keep fingers close together when playing sports so that there’s as little shock as possible when things go wrong.
Finishing Touches
Once the finger is wrapped, secure the end of the tape with a final strip to prevent unraveling. Test the finger’s range of motion and adjust the tape if necessary to ensure comfort and functionality.
Remember, taping a jammed finger is temporary and should not replace proper medical evaluation or treatment. If the pain persists or the injury worsens, consult a healthcare professional for further assessment.
Understanding Jammed Fingers
Jammed fingers are a common injury that can affect anyone who plays sports or does activities that involve catching or throwing objects.
They occur when the tip of the finger is bent backward or sideways, causing damage to the ligaments and joints. Jammed fingers can be painful and limit the range of motion of the finger.
Definition And Causes Of Jammed Fingers:
A jammed finger is a type of sprain that affects the proximal interphalangeal (PIP) joint, which is the finger’s middle joint. The PIP joint is surrounded by ligaments that help stabilize and support the joint.
When the finger is bent backward or sideways with force, the ligaments can stretch or tear, resulting in a jammed finger.
Sports injuries like basketball, volleyball, or baseball most commonly cause jammed fingers. They can also occur from accidents, such as slamming a door or falling on the hand.
Common Symptoms And Signs Of A Jammed Finger:
The main symptom of a jammed finger is pain in the affected joint. The pain may be sharp, throbbing, or dull, depending on the severity of the injury. Other symptoms and signs of a jammed finger include:
- Swelling and inflammation of the joint
- Bruising and discoloration of the skin
- Stiffness and difficulty moving the finger
- Deformity or misalignment of the joint
- Numbness or tingling in the finger
Potential Risks And Complications Of Untreated Jammed Fingers:
If left untreated, jammed fingers can lead to severe complications that can affect the function and appearance of the finger. Some of these complications are:
- Chronic pain and stiffness of the joint
- Arthritis and degeneration of the cartilage
- Loss of range of motion and flexibility of the finger
- Permanent deformity or malunion of the joint
- Infection or abscess formation in the joint
Preparing For Finger Taping
Before taping a jammed finger, it is essential to prepare properly. This involves gathering necessary supplies, ensuring cleanliness, and hygiene, and assessing the severity of the injury.
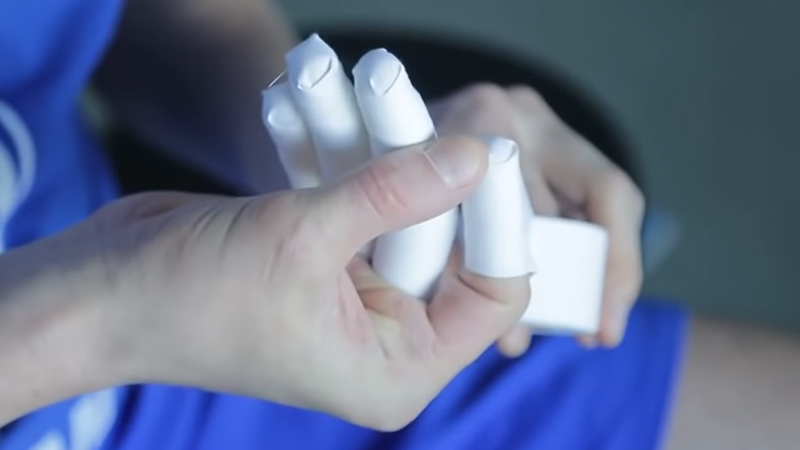
Gathering Necessary Supplies
Collect the required materials like adhesive tape, scissors, and padding material like foam or cotton. These supplies will be crucial for supporting and stabilizing the injured finger.
Ensuring Cleanliness And Hygiene
Wash your hands thoroughly to maintain cleanliness and minimize the risk of infection. Use an antiseptic solution or wipe to clean the injured finger and surrounding area.
Assessing The Jammed Finger’s Severity
Evaluate the injury’s extent to determine the appropriate taping technique. Check for signs of swelling, bruising, or difficulty moving the finger. If the injury appears severe or there is intense pain, it is advisable to seek medical attention.
Following these steps, you can adequately prepare for finger taping, ensuring a more effective and safe approach to managing a jammed finger.
Step-By-Step Guide To Taping A Jammed Finger
Proper taping can provide support and stability to promote healing when dealing with a jammed finger. Following a step-by-step approach, you can effectively tape your injured finger and minimize discomfort.
This guide outlines the process, highlighting essential techniques and considerations for buddy taping, applying anchor strips, creating a support loop, and reinforcing the taping.
Step 1: Buddy Taping The Injured Finger
Buddy taping involves securing the injured finger to an adjacent healthy finger for stability. This technique helps immobilize the jammed finger, reducing the risk of further injury and promoting healing.
However, it’s important to note that buddy taping may provide a different level of support than a splint or brace.
Step 2: Applying Anchor Strips
To begin taping, place the first anchor strip near the finger’s base, wrapping it around the healthy finger and over the injured one. This provides a foundation for the taping.
Additional anchor strips should be applied along the finger’s length, securing the injured finger to the healthy one.
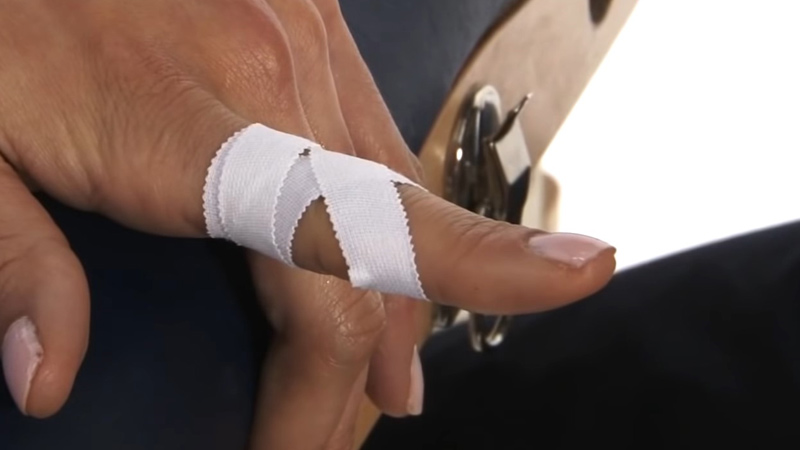
Step 3: Creating A Support Loop
Position the support loop by placing a strip of tape perpendicular to the finger, just below the injured joint. The loop should be wide enough to accommodate the finger comfortably.
Secure the loop around the wounded finger, ensuring it’s snug but not too tight to restrict blood flow or cause discomfort.
Step 4: Reinforcing The Taping
Add additional strips of tape diagonally across the injured finger to enhance stability. These strips act as reinforcements, providing extra support and preventing excessive movement.
Maintaining flexibility and range of motion while taping is crucial, as extreme rigidity can impede the finger’s healing process.
Following these steps, you can effectively tape a jammed finger and provide healing support. Remember to consult a healthcare professional if the pain persists or you have concerns about the injury.
Common Mistakes To Avoid
When it comes to taping, it’s crucial to avoid common mistakes that can compromise the effectiveness and safety of the taping technique. By being aware of these pitfalls and taking proactive measures to address them, you can ensure optimal results and minimize the risk of injury.
Here are some common mistakes to avoid when applying tape:
Taping Too Tightly
Applying tape too tightly can restrict blood circulation and cause discomfort or damage to the underlying tissues. It’s essential to balance providing support and allowing adequate blood flow.
Ignoring Signs Of Discomfort Or Circulation Issues
Pay attention to any signs of discomfort, such as numbness, tingling, or discoloration, which may indicate poor circulation. If these symptoms arise, the tape should be adjusted or removed promptly to prevent further complications.
Neglecting Finger Alignment
Fingers should be aligned appropriately when taping to ensure optimal stability and support. Neglecting correct finger alignment can result in ineffective taping and worsen the condition.
Using Incorrect Taping Techniques:
Using wrong taping techniques can undermine the intended purpose of the tape and lead to suboptimal outcomes. Learning and following proper taping techniques is crucial to maximizing the benefits and applying the tape correctly.
By avoiding these common mistakes, you can enhance the effectiveness of taping and minimize the risk of complications. Proper technique, appropriate tension, and regular monitoring of the taped area are vital elements to consider for successful taping outcomes.
Tips For Effective Finger Taping
Finger tapping is a common technique used by athletes and individuals with finger injuries to provide stability and support. Proper taping can help prevent further damage, promote healing, and improve performance.
Here are some essential tips to ensure effective finger taping:
Consulting With A Healthcare Professional Or Athletic Trainer
Before starting any taping regimen, it is advisable to seek guidance from a healthcare professional or athletic trainer. They can assess your specific condition and provide expert advice on the appropriate taping technique for your needs.
Practicing Proper Taping Techniques
Learning the correct method is crucial for achieving effective results. Take the time to understand the appropriate placement of the tape, ensuring it provides adequate support to the injured area while allowing for necessary movement. This can help minimize discomfort and maximize the benefits of taping.
Regularly Monitoring And Adjusting The Tape During Activity
While engaged in physical activity, it is essential to monitor it regularly. Check for signs of loosening, wrinkling, or discomfort. Adjust the tape to maintain the proper support and ensure optimal comfort and functionality.
Removing The Tape Correctly To Avoid Skin Irritation Or Injury
Do it carefully and gently when it’s time to remove it. Pulling the tape too forcefully can cause skin irritation or even lead to additional damage. Use a mild adhesive remover if necessary, and take your time to remove the tape gradually.
FAQ
What materials do I need to tape a jammed finger for basketball?
For added comfort, you will need athletic tape, scissors, and possibly pre-wrap or adhesive bandages.
How do I prepare the jammed finger before taping?
Clean the area around the jammed finger before taping and remove any jewelry or accessories. Also, ice the finger for 15-20 minutes to reduce swelling.
What is the recommended taping technique for a jammed finger in basketball?
One common technique involves buddy taping, where you tape the injured finger to an adjacent, uninjured finger for support and stability.
How tight should the tape be when taping a jammed finger?
The tape should be snug but not too tight, as excessive pressure can restrict blood flow. Leave some room for movement and avoid wrapping the tape around the injured finger too tightly.
How long can I keep the tape on a jammed finger?
Removing the tape after each practice or game is generally recommended to allow the finger to rest and recover. However, consult a healthcare professional for guidance if the injury is severe or you experience ongoing discomfort.
To Recap
Finger taping is essential for basketball players who want to prevent and treat jammed fingers. Jammed fingers are a common injury that can affect the performance and enjoyment of the game.
Learning how to tape a jammed finger correctly can reduce joint pain, swelling, and instability and speed up the healing process. You can also avoid common mistakes that can cause more harm than good when taping a jammed finger.
Finger protection is crucial not only for your health but also for your confidence and success on the court. We hope this guide has helped you understand how to tape a jammed finger in basketball and how to promote a safe and healthy basketball experience.